As you could see in the first episode of “Symesterskapet” I have 4 sewing machines. That might sound like a lot (and it kind of is I guess…) but they all serve different purposes and do very different types of jobs! I thought I can let you know what kind of machines I have, and what kind of purpose they each serve. This is not advertisement in any way, these are not necessarily the best machines or anything, they are what I bought based on what suited my budget and my needs at the time of each purchase.
When I was younger I would borrow my mothers old singer machine. It was good enough, but eventually, especially after I moved away from home, I wanted my own. For my 18th birthday I got my first sewing machine as a combined birthday and Christmas present from my parents and grandparents. It took me almost a year before I bought one, but once I did it did get used quite a lot
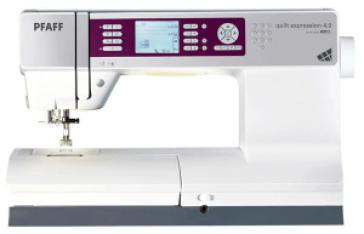
I bought a PFAFF Quilt Expression 4.0. It’s a sewing machine that is powerful and stable and can sew jeans and leather (although not tooo many layers of these) and has both top and bottom feed, which makes it quite easy to sew straight and neat. It has a lot of different stitches, especially for quilting, which I haven’t used much yet, but still plan on using! It has some fake overlock stitches that are a bit slow, but give a much nicer finish than normal zig zag stitches. You can easily lower the bottom feeder and do free hand quilting/sewing/embroidery. It can stitch 9mm wide stitches which is nice, and it has letters in two simple fonts as well that I thought was very cool at the time, but that I haven’t used too much after all. I was very happy with this machine overall and still is.
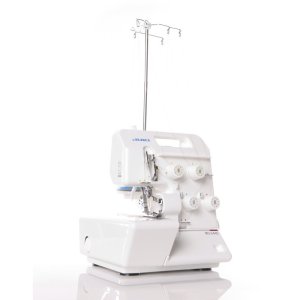
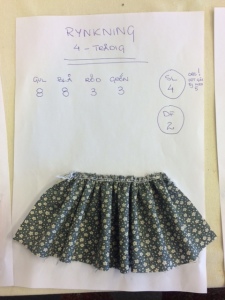
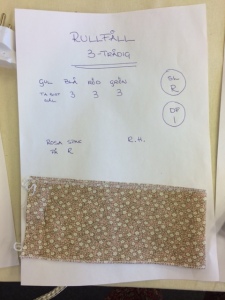
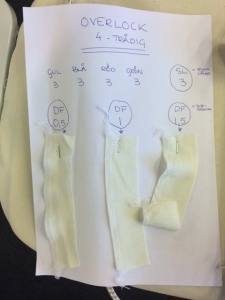
The second sewing machine I got I bought myself after I graduated university. It is an overlocker. Mine is a Juki MO644D Portable Serger. It’s not the best out there, but it does the job I need it to do. I have tried another one since that I like more and hope to buy one day (it can be useful to have two, as they’re a bit annoying to rethread) but that’ll have to wait! Sergers, or overlockers, are mostly used to get a nice and quick finish on the inside of your sewing projects. It uses four threads that interlock (or …. overlock haha!) and protect your fabric from fraying. Right before stitching it simultaneously cuts your fabric with two knives which gives a really neat finish. Sergers sews with 4 threads, and two needles, but you can also use less threads and/or needles for different finishes, such as a rolled hem. You can also use differential feed to gather your fabric or to make a lettuce edge for instance. Sergers can be a bit intimidating in the beginning, but once you get used to it it opens up so many posibilities and makes a lot of your sewing a lot faster, easier and more professional looking!
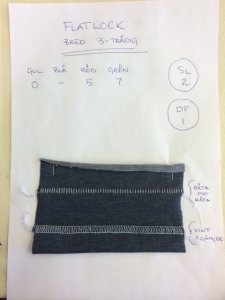
Below are some of the ways you can use a serger, these were made for us as a reference the day before the challenges started at Symesterskapet, so that we all knew how to use the machines they had there. The settings here won#t be the same on all sergers.
My next two machines were bought with a government grant I received called “Statens Kunstnerstipend for Nyutdannede Kunstnere” and I would not have purchased these at this stage without that grant, but I am so happy that I have them!
One of these was a coverstitch machine. I have the Janome Coverpro 1000 cpx. A cover stitch works in a similar way to an overlock machine, but it doesn’t cut the fabric as it sews, which allows you to stitch anywhere you want on your project. It also does straight stitches on the top while it does cover stitches on the underside. This allows you to make the seams you typically see on the hem of t-shirts for instance. You can simply fold a hem over and it will finish the edge on the back and at the same time make a nice straight stitch on top.
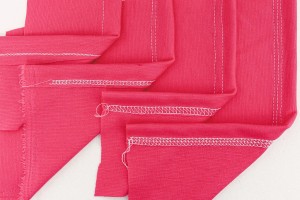
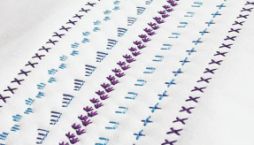
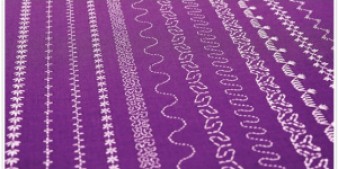
some of the typical cover stitch stitches. See https://www.seamworkmag.com/issues/2015/06/coverstitch-machines for more info
My last, 4th and biggest machine is my Embroidery machine. It is a Brother PR-620 Embroide3ry machine, with 6 needles. It’s quite obvious what it does, it embroiders 
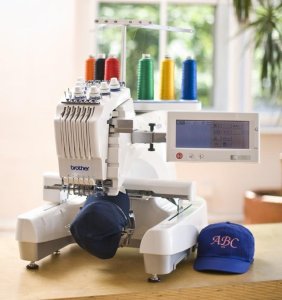
So that’s a bit about my machines! Maybe you now know a bit more about what’s out there! I’ve done most of my sewing on the Pfaff machine, and these others are really not necessary to get most of your sewing projects done, but since I’m hoping to make a living on this eventually they are a good investment that will make my work a bit easier, more professional looking and faster.
Let me know if there’s anything about this you’d like to know more about, and I can try to write about it later


1 Comment
Join the discussion and tell us your opinion.
[…] jeg drømmer og gleder meg til den dagen jeg eier en Overlock, og jeg er kjempe misunnelig over Eva og hennes fire (!) symaskiner! Men synes det er viktigst, og ikke minst mest inspirerende er å se hva folk får til med […]